Overview
The article delineates four essential steps to mastering the use of a 2 ml pipette, pivotal for achieving accurate laboratory results. These steps encompass:
- Gathering necessary tools
- Preparing the pipette
- Executing the pipetting procedure
- Troubleshooting common issues
Each step underscores the critical importance of calibration, proper technique, and the use of high-quality materials, all aimed at enhancing measurement precision and maintaining the integrity of lab results. By following these guidelines, laboratory professionals can ensure their work meets the highest standards of accuracy and reliability.
Introduction
Mastering the art of using a 2 ml pipette is crucial for achieving accurate laboratory results. Many individuals, however, face challenges in perfecting this essential skill. With the right tools and techniques, anyone can significantly enhance their pipetting accuracy and reliability. But what occurs when seemingly minor mistakes lead to substantial discrepancies in experiments? This guide explores the four critical steps to mastering the 2 ml pipette, empowering readers to navigate common pitfalls and elevate their laboratory practices.
Gather Essential Tools and Materials
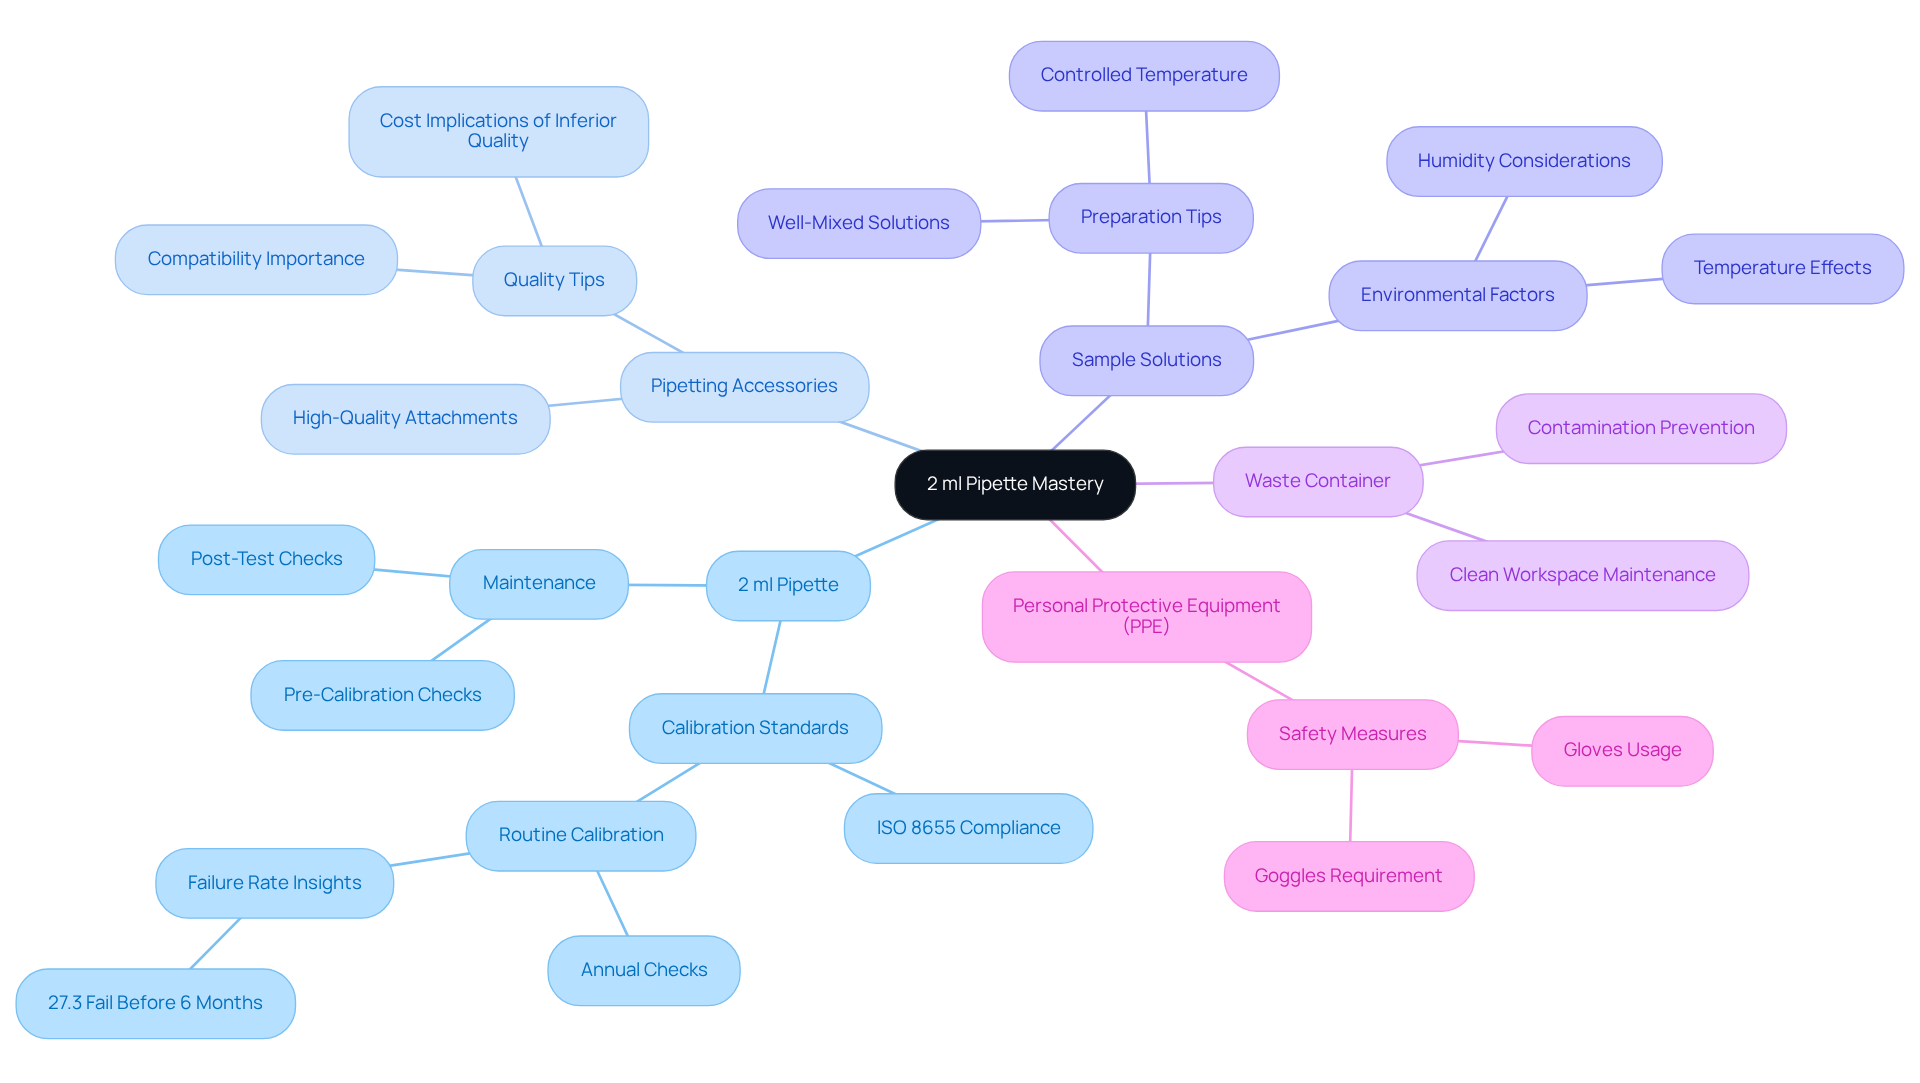
To master the 2 ml pipette, it is essential to gather the following crucial tools and materials:
- 2 ml Pipette: Ensure it is calibrated according to ISO 8655 standards and in good working condition. Uncalibrated pipettes can lead to in liquid transfer, ultimately impacting experimental results. Statistics show that 27.3 percent of these devices fail on or before the six-month mark, underscoring the necessity for routine calibration assessments.
- Pipetting Accessories: Utilize high-quality attachments that fit securely on the device to prevent leakage and ensure precise dispensing. Compatibility between the device and tips is vital for maintaining calibration precision; inferior quality tips may result in fit problems and contribute to increased expenses over time.
- Sample Solutions: Prepare the substances you intend to pipette, ensuring they are well-mixed and at the correct temperature. Environmental factors, such as temperature and humidity, can affect liquid properties and pipetting accuracy, making it essential to maintain controlled conditions.
- Waste Container: Have a designated container for used tips to maintain a clean workspace and prevent contamination, which can compromise results.
- Personal Protective Equipment (PPE): Wear gloves and goggles to ensure safety while handling chemicals. Proper safety measures are integral to laboratory practices.
Having these items ready will streamline the use of the 2 ml pipette and allow you to focus on achieving accurate measurements, which is critical for maintaining the integrity of laboratory results. Routine calibration, at least once annually, is crucial to verify that your instrument dispenses the accurate volume consistently.

Prepare the Pipette for Accurate Measurements
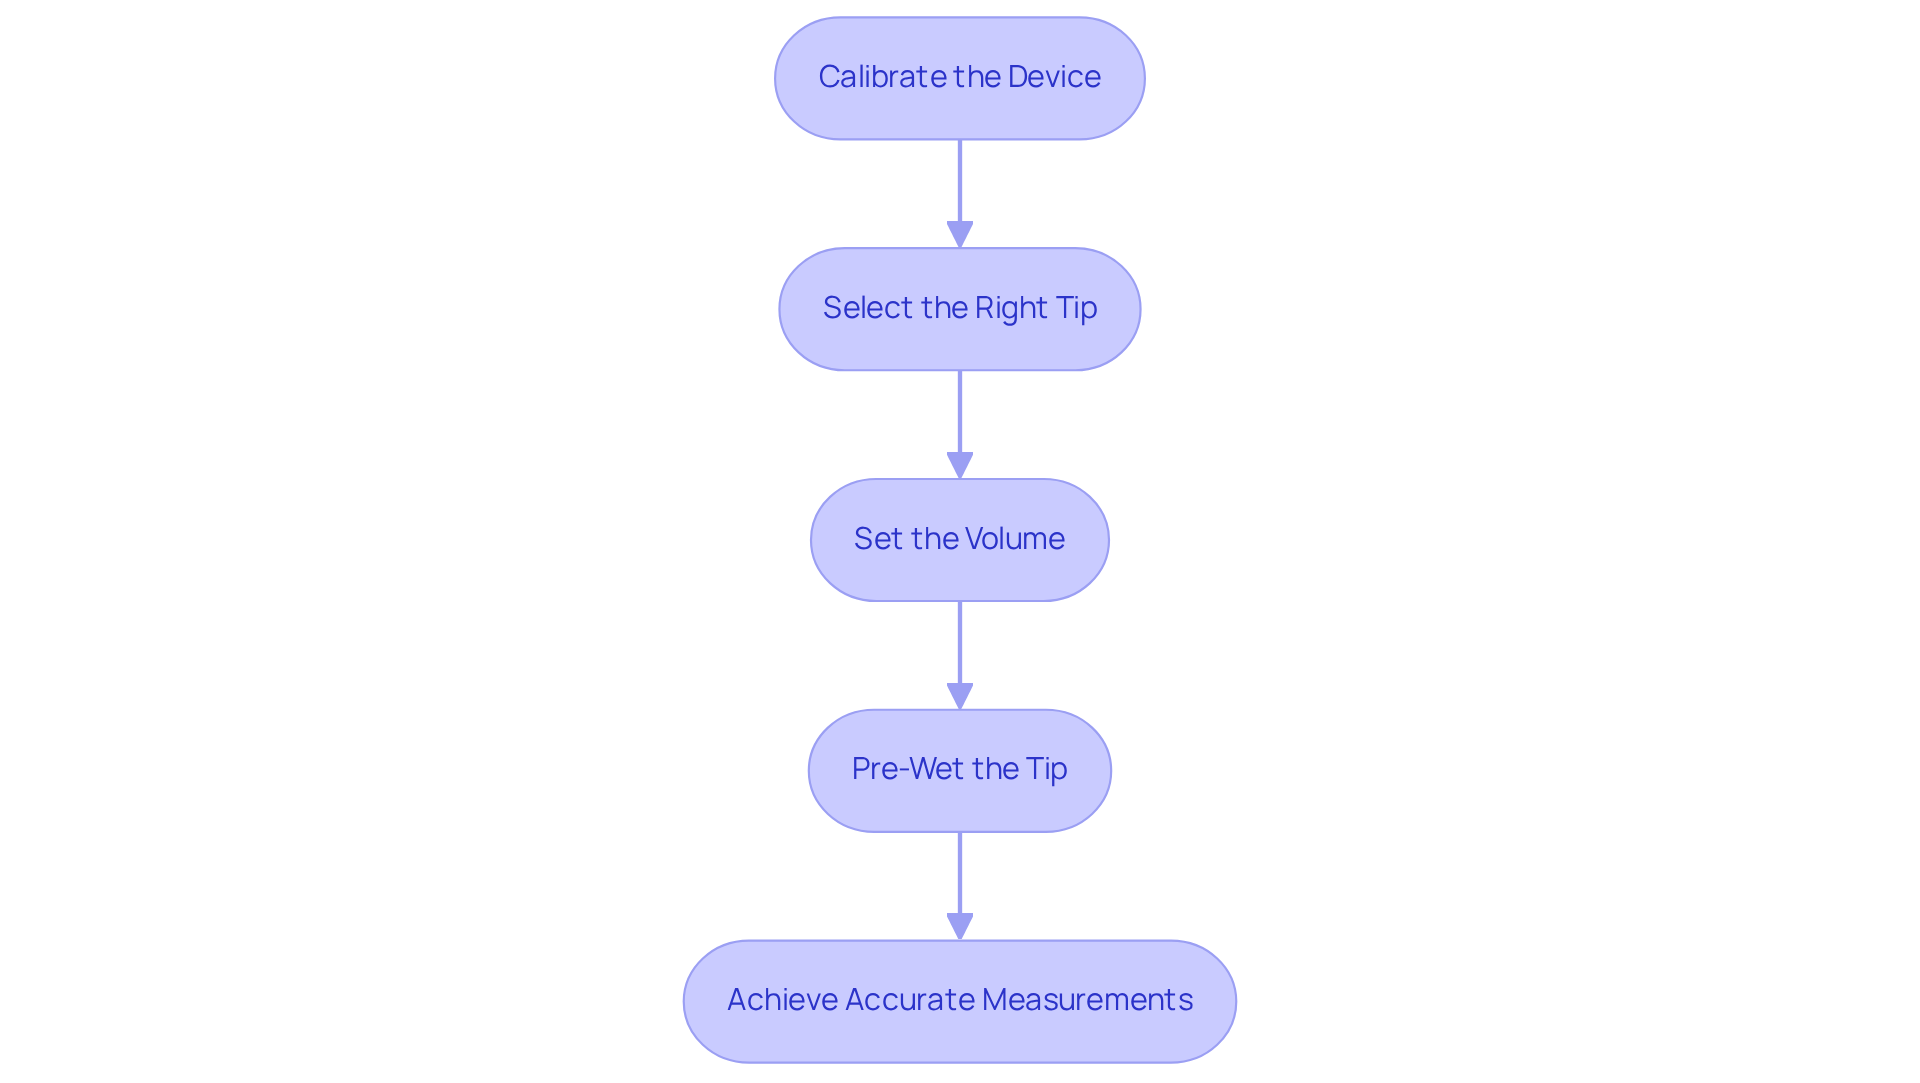
To achieve precise measurements with your pipette, it is imperative to adhere to these essential preparation steps:
- Calibrate the device: Start by confirming the calibration of your instrument in line with the manufacturer's specifications. Pipettes require calibration at least annually, with recommendations for more frequent checks every 3 to 6 months for high-precision applications. , as even slight deviations can result in substantial errors in your outcomes.
- Select the Right Tip: It is vital to choose a tip that is compatible with your instrument's size. A proper fit is essential to prevent air leaks, which can undermine measurement accuracy. For optimal performance, high-quality tips made from pure virgin polypropylene are recommended, as they ensure consistent liquid delivery.
- Set the volume by adjusting the device to your desired level, specifically using a 2 ml pipette, by turning the volume adjustment knob until the display reflects the correct measurement. Ensure that the pipette is configured to the appropriate range for the volume you plan to dispense.
- Pre-Wet the Tip: To minimize discrepancies caused by surface tension, aspirate the solution and dispense it back into the original container several times prior to your actual measurement. This pre-wetting procedure is essential for ensuring that the solution adheres uniformly to the tip, thereby enhancing the precision of your pipetting.
By diligently executing these preparation steps, you will markedly enhance the accuracy and reliability of your pipetting, which is critical for achieving high-quality laboratory results.

Execute the Pipetting Procedure
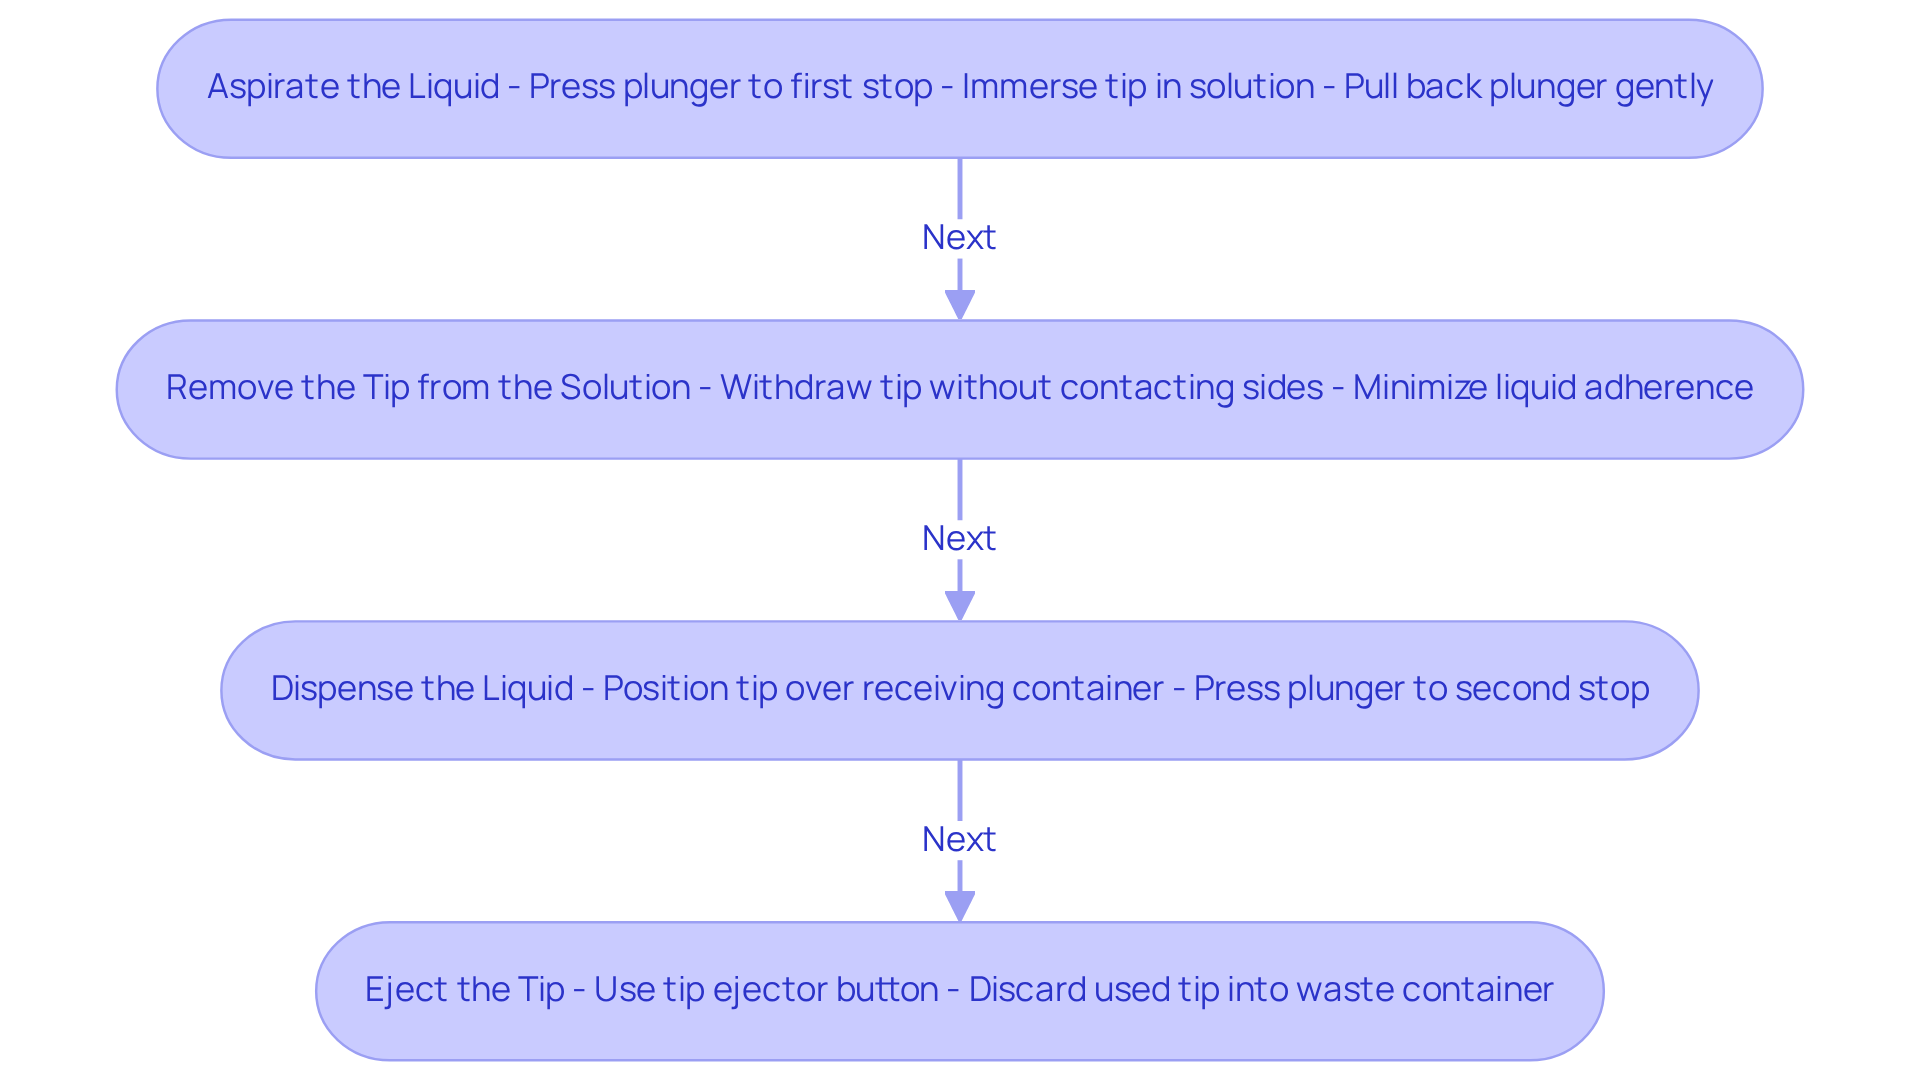
To execute the pipetting procedure accurately, it is essential to follow these steps meticulously:
- Aspirate the Liquid: Start by pressing the plunger to the first stop. Immerse the transfer tip into the solution, ensuring it is submerged to prevent air from being drawn in. Gently pull back the plunger of the 2 ml pipette to draw the fluid into the tip, ensuring a steady hand to avoid introducing air bubbles, which can significantly affect precision. Be aware that air bubbles can result in volume discrepancies, making careful handling of the 2 ml pipette essential.
- Remove the Tip from the Solution: After aspirating the solution, withdraw the tip from the container without contacting the sides. This action minimizes the risk of liquid adhering to the tip, which can lead to further volume discrepancies. Employing high-quality transfer tips can further reduce the risk of cross-contamination and ensure replicability of results.
- Dispense the Liquid: Position the transfer device tip over the receiving container. Press the plunger to the second stop to dispense the entire volume, ensuring a complete transfer. Smoothly remove the tip from the container to avoid splashing or residual liquid. Regular calibration of your instrument with a 2 ml pipette is vital for maintaining accuracy and adhering to global standards, such as ISO 8655.
- Eject the Tip: Finally, utilize the tip ejector button to discard the used tip into the waste container, thereby keeping your workspace clean and organized. Ensure that your liquid handling device is calibrated using the gravimetric method, recognized as the gold standard for accuracy and precision.
By meticulously adhering to these steps and recognizing the significance of calibration and high-quality materials, you will enhance the accuracy and reliability of your measurements, which is crucial for maintaining the integrity of your laboratory results.

Troubleshoot Common Pipetting Issues
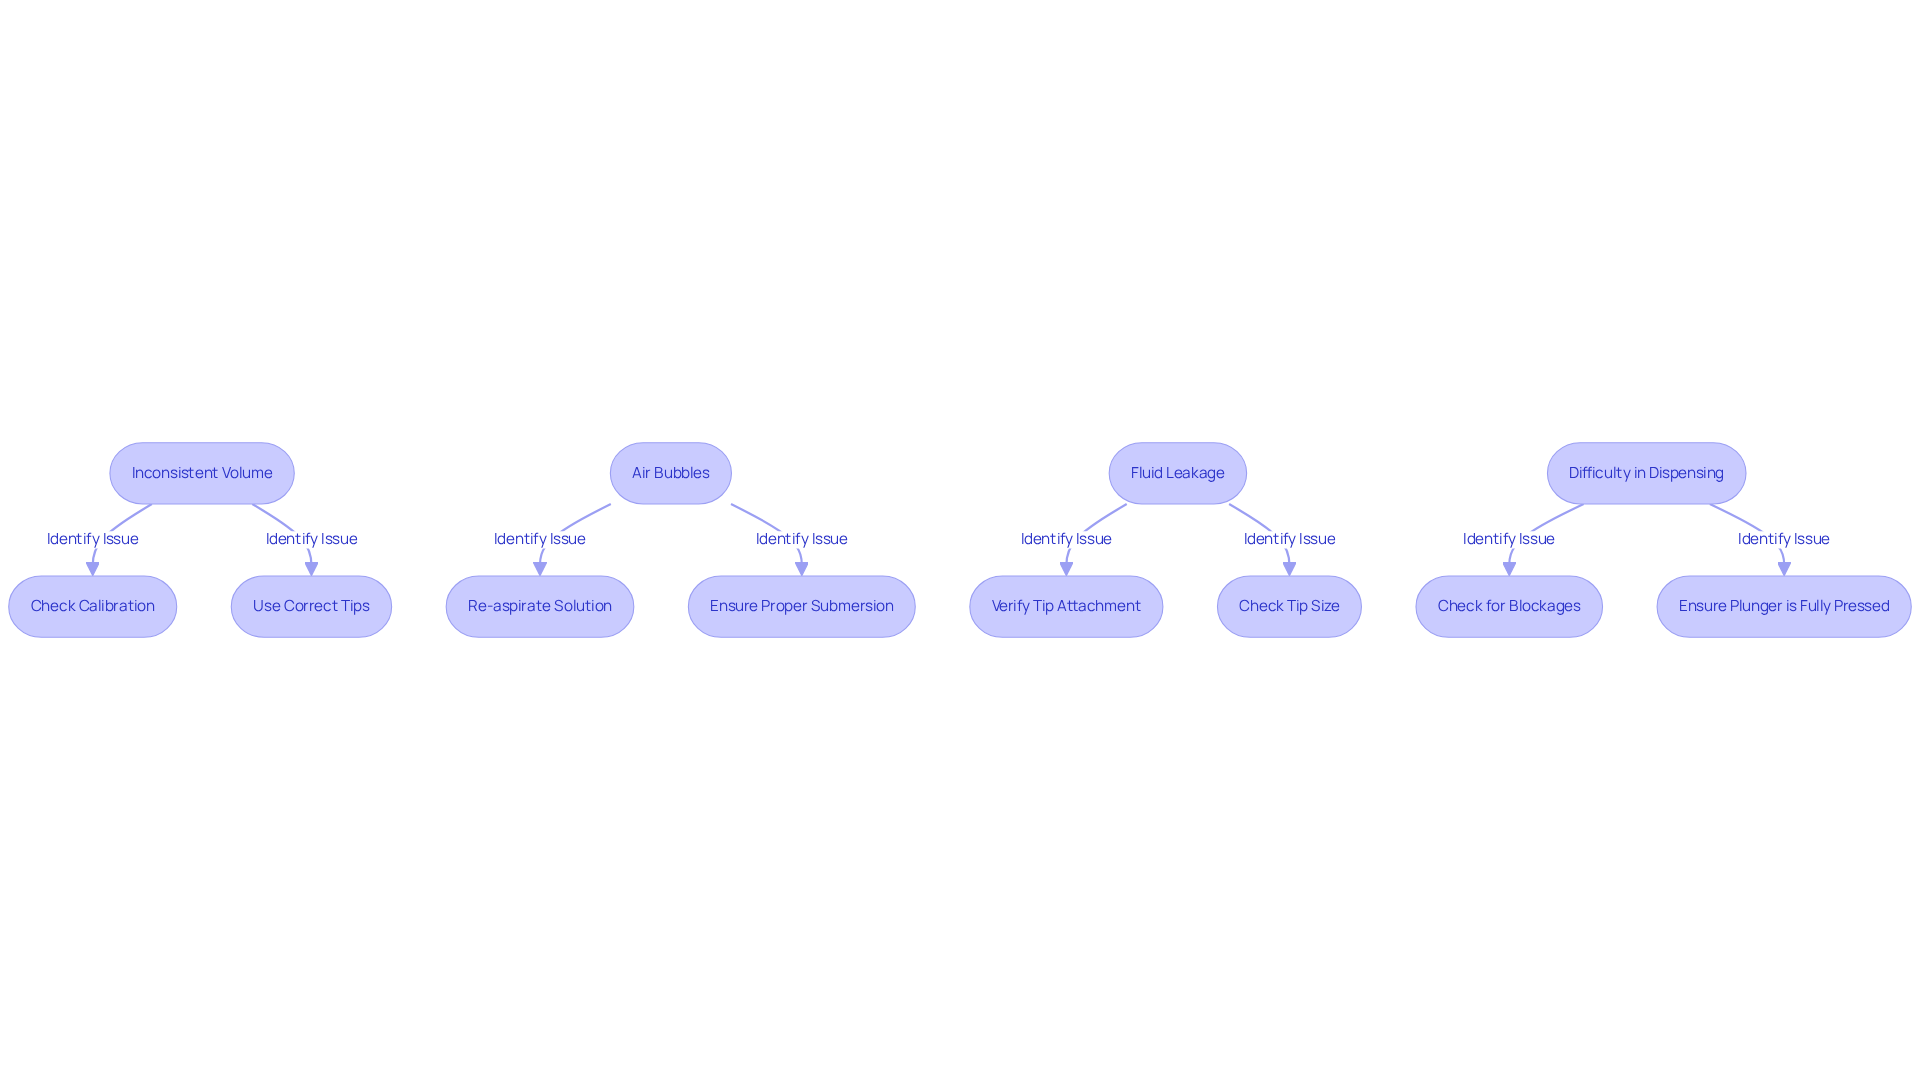
Common pipetting issues can significantly hinder your laboratory results, but understanding how to troubleshoot them is essential for achieving accuracy.
- Inconsistent Volume: Variations in the volume dispensed may indicate a need to check the calibration of your pipette. Ensure you are using the correct tips for the 2 ml pipette, as daily calibration practices can reduce instrument drift and guarantee precise measurements.
- Air Bubbles: The presence of air bubbles in the tip can compromise your results. To resolve this, re-aspirate the solution, making sure the tip is submerged properly to avoid drawing in air. Remember, "Pipetting errors can significantly of your dilutions."
- If you observe fluid leakage from the tip of the 2 ml pipette, it is crucial to verify that the tip is securely attached and that it is the appropriate size for your application.
- Difficulty in Dispensing: Struggling to dispense the liquid can be frustrating. Check for blockages in the tip or ensure that the plunger is being pressed fully to facilitate the process.
By recognizing and addressing these common issues, you can enhance your pipetting skills and achieve more accurate lab results. Incorporating quality assurance practices into your pipetting routine will further ensure consistent performance and reliability in laboratory settings. For deeper insights, consider reviewing case studies on common pipetting errors and strategies to avoid them.

Conclusion
Mastering the use of a 2 ml pipette is essential for achieving precise laboratory results. This article outlines a systematic approach that underscores the significance of preparation, execution, and troubleshooting in pipetting. By adhering to these guidelines, laboratory professionals can enhance their accuracy and reliability, ultimately ensuring that their experiments yield valid and reproducible outcomes.
Key arguments presented include:
- The necessity of utilizing calibrated equipment
- Selecting compatible tips
- Following proper pipetting techniques
Each stage of the pipetting process, from gathering essential tools to troubleshooting common issues, plays a crucial role in maintaining the integrity of results. Regular calibration checks and the use of high-quality materials are vital for minimizing errors and ensuring consistent performance.
In summary, the importance of accurate pipetting cannot be overstated. By implementing best practices and recognizing common pitfalls, laboratory professionals can significantly improve their liquid transfer accuracy. Embracing these guidelines not only enhances individual performance but also contributes to the broader goal of scientific reliability and excellence. Prioritizing meticulous pipetting practices is an investment in the quality of research and experimentation, ultimately leading to more trustworthy scientific advancements.


