Overview
This article serves as a comprehensive step-by-step guide for lab managers, detailing how to effectively conduct H3PO4 titration. It emphasizes the critical importance of understanding the acid's triprotic nature alongside proper procedural techniques.
Essential materials are outlined, and precise methods for endpoint detection are provided, ensuring that lab managers can navigate common troubleshooting issues. This thorough approach guarantees accurate results in determining phosphoric acid concentration, reinforcing the necessity of high-quality scientific instruments in laboratory settings.
Introduction
Phosphoric acid, a triprotic acid renowned for its unique ability to sequentially donate protons, poses both challenges and opportunities in laboratory titration processes. Understanding the intricacies of H3PO4 titration is essential for lab managers striving for accuracy in analytical results. This process requires navigating the complexities of its ionization constants and the behavior of weak acids in solution. Yet, a critical question persists: how can one ensure precision in this delicate process, particularly when common pitfalls may lead to significant discrepancies in outcomes?
Understand the Basics of H3PO4 Titration
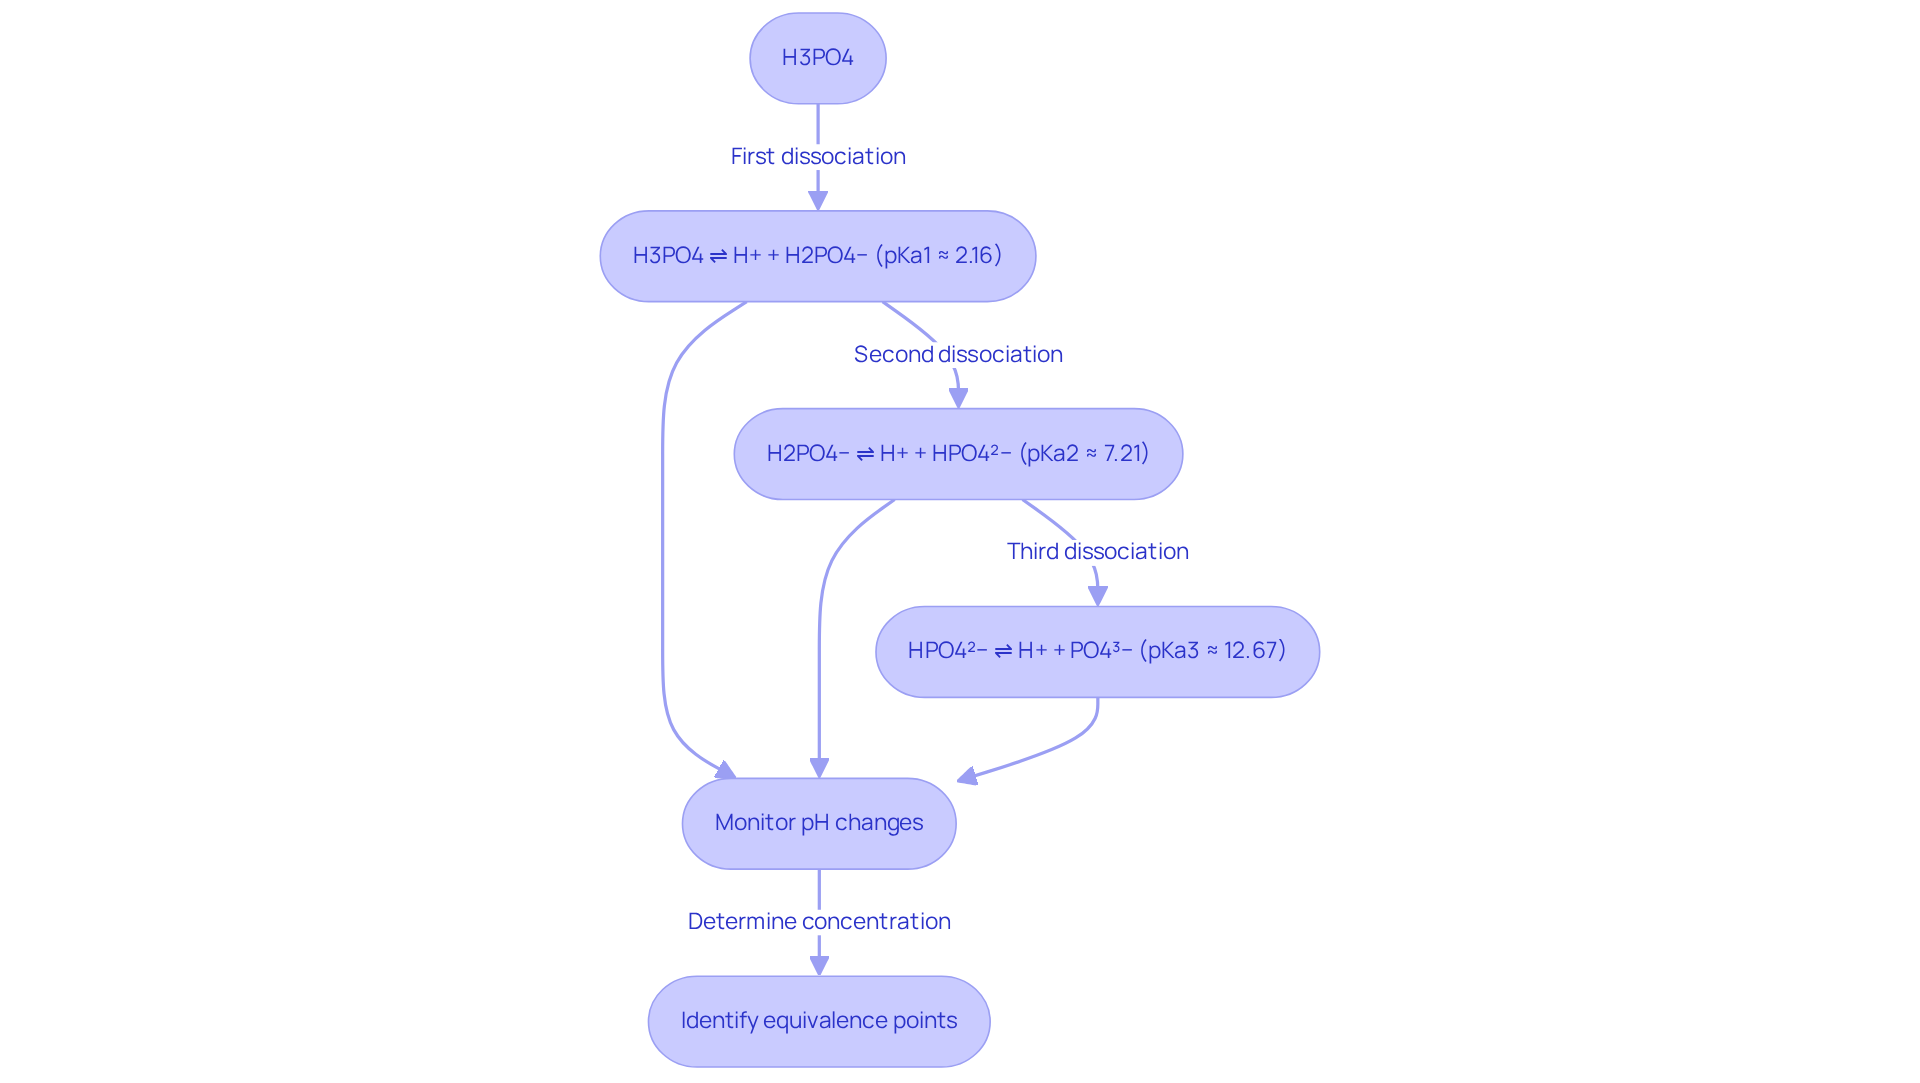
Phosphoric acid is classified as a triprotic acid, capable of donating three protons (H+) in a sequential manner. Understanding its (pKa values) is essential for analyzing H3PO4 titration curves and accurately assessing the concentration of phosphoric acid in a solution. The three dissociation steps are as follows:
- First dissociation (pKa1 ≈ 2.16): H3PO4 ⇌ H+ + H2PO4−
- Second dissociation (pKa2 ≈ 7.21): H2PO4− ⇌ H+ + HPO4²−
- Third dissociation (pKa3 ≈ 12.67): HPO4²− ⇌ H+ + PO4³−
Monitoring pH changes during titration is crucial for accurately identifying the equivalence points. The curve obtained from this process will display distinct areas related to each separation step, which is vital for determining the concentration of H3PO4 in the sample. Recent studies have indicated that the expected volume of NaOH required to reach pH 7 is often less than anticipated due to the weak nature of phosphoric acid. For example, a physics graduate student discovered that only 12-15 mL of 0.10 M NaOH was necessary to neutralize 100 mL of 0.010 M phosphoric acid, contrary to the expected 30 mL. This discrepancy underscores the importance of comprehending the acid's behavior in solution and the implications of its equilibrium constants in acid-base reactions. As Ed V. noted, "Phosphoric acid (which is a weak acid) releases its protons in 3 different stages. It has 3 pKa values for 3 dissociations. So it is impossible to get a 1:1 reaction, reactant condition when titrating." This observation highlights the complexity involved in H3PO4 titration of weak acids and reinforces the necessity for lab managers to consider these factors in their analyses.

Gather Required Materials and Equipment
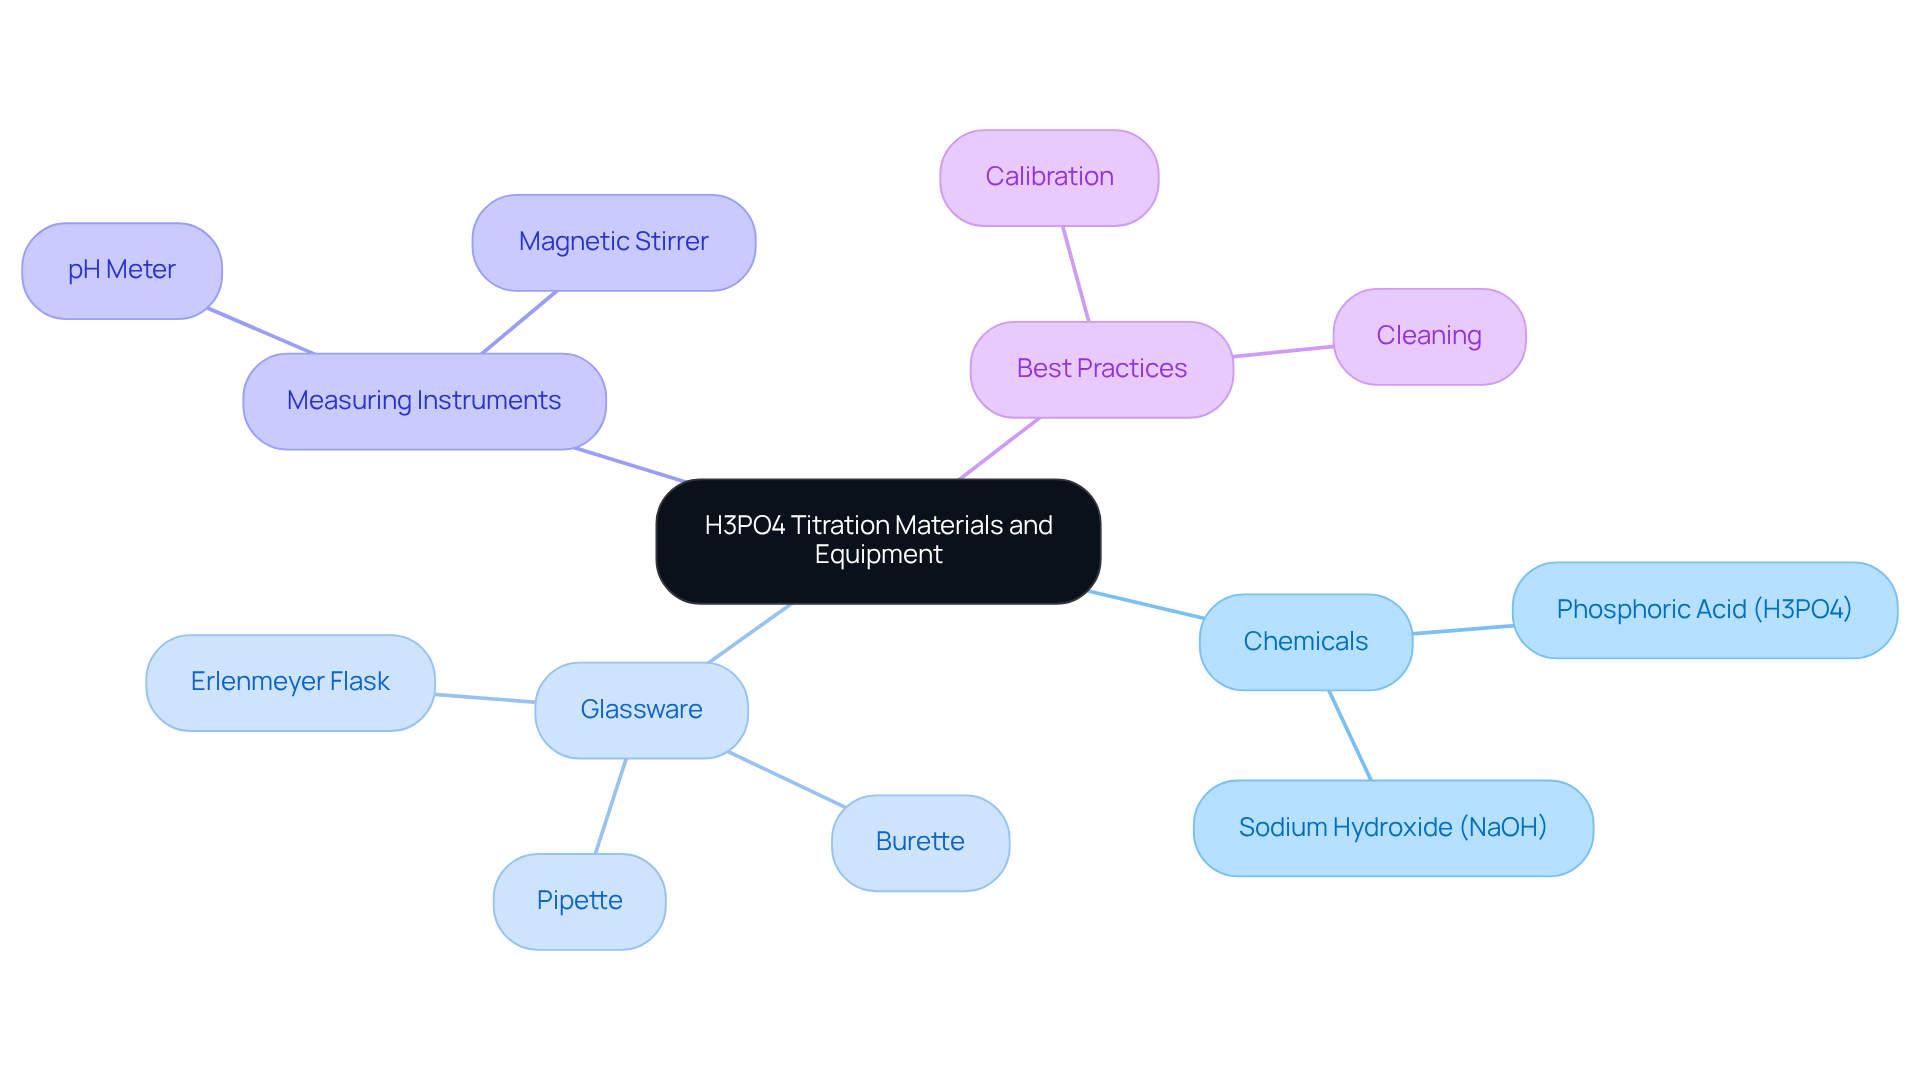
To successfully conduct an , certain materials and equipment are essential. In the H3PO4 titration, Phosphoric Acid (H3PO4) serves as the analyte, the concentration of which you aim to determine. Sodium Hydroxide (NaOH), a standardized titrant typically available at concentrations of 0.1 M or 0.2 M, is crucial for obtaining precise analytical results. The burette is indispensable for accurate dispensing of the titrant, enabling controlled addition during the analysis process. Regular calibration of the burette is necessary to maintain accuracy, as emphasized by the Clinical and Laboratory Standards Institute (CLSI). The pipette is used to measure a specific volume for the H3PO4 titration mixture, ensuring consistency in your experiments. Modern pipettes, including electronic options, can enhance precision in liquid delivery.
The Erlenmeyer flask holds the reaction mixture, facilitating easy mixing and observation of the reaction. A pH meter or pH indicator is crucial for observing pH variations during the process, aiding in the precise identification of the endpoint. Automated systems can minimize human error, as noted by Gayle Gleichauf from Thermo Fisher Scientific. The magnetic stirrer ensures thorough mixing of the mixtures, promoting uniform reaction conditions. Distilled water is essential for diluting solutions as required, preserving the integrity of your analysis. An indicator, such as methyl orange or phenolphthalein, provides a visual cue signaling the endpoint of the process, allowing for the precise determination of the analyte's concentration.
Before initiating the process, ensure that all glassware is meticulously cleaned and calibrated. This step is critical to prevent contamination and guarantee accurate results, aligning with best practices in pharmaceutical laboratories. Furthermore, being aware of common problems that may arise during the process, such as inaccurate equipment calibration and impurities in reagents, can assist lab managers in avoiding pitfalls and ensuring reliable outcomes.

Follow the Step-by-Step Titration Procedure
To perform an accurate H3PO4 titration using JM Science Inc.'s premium scientific instruments, follow these detailed steps:
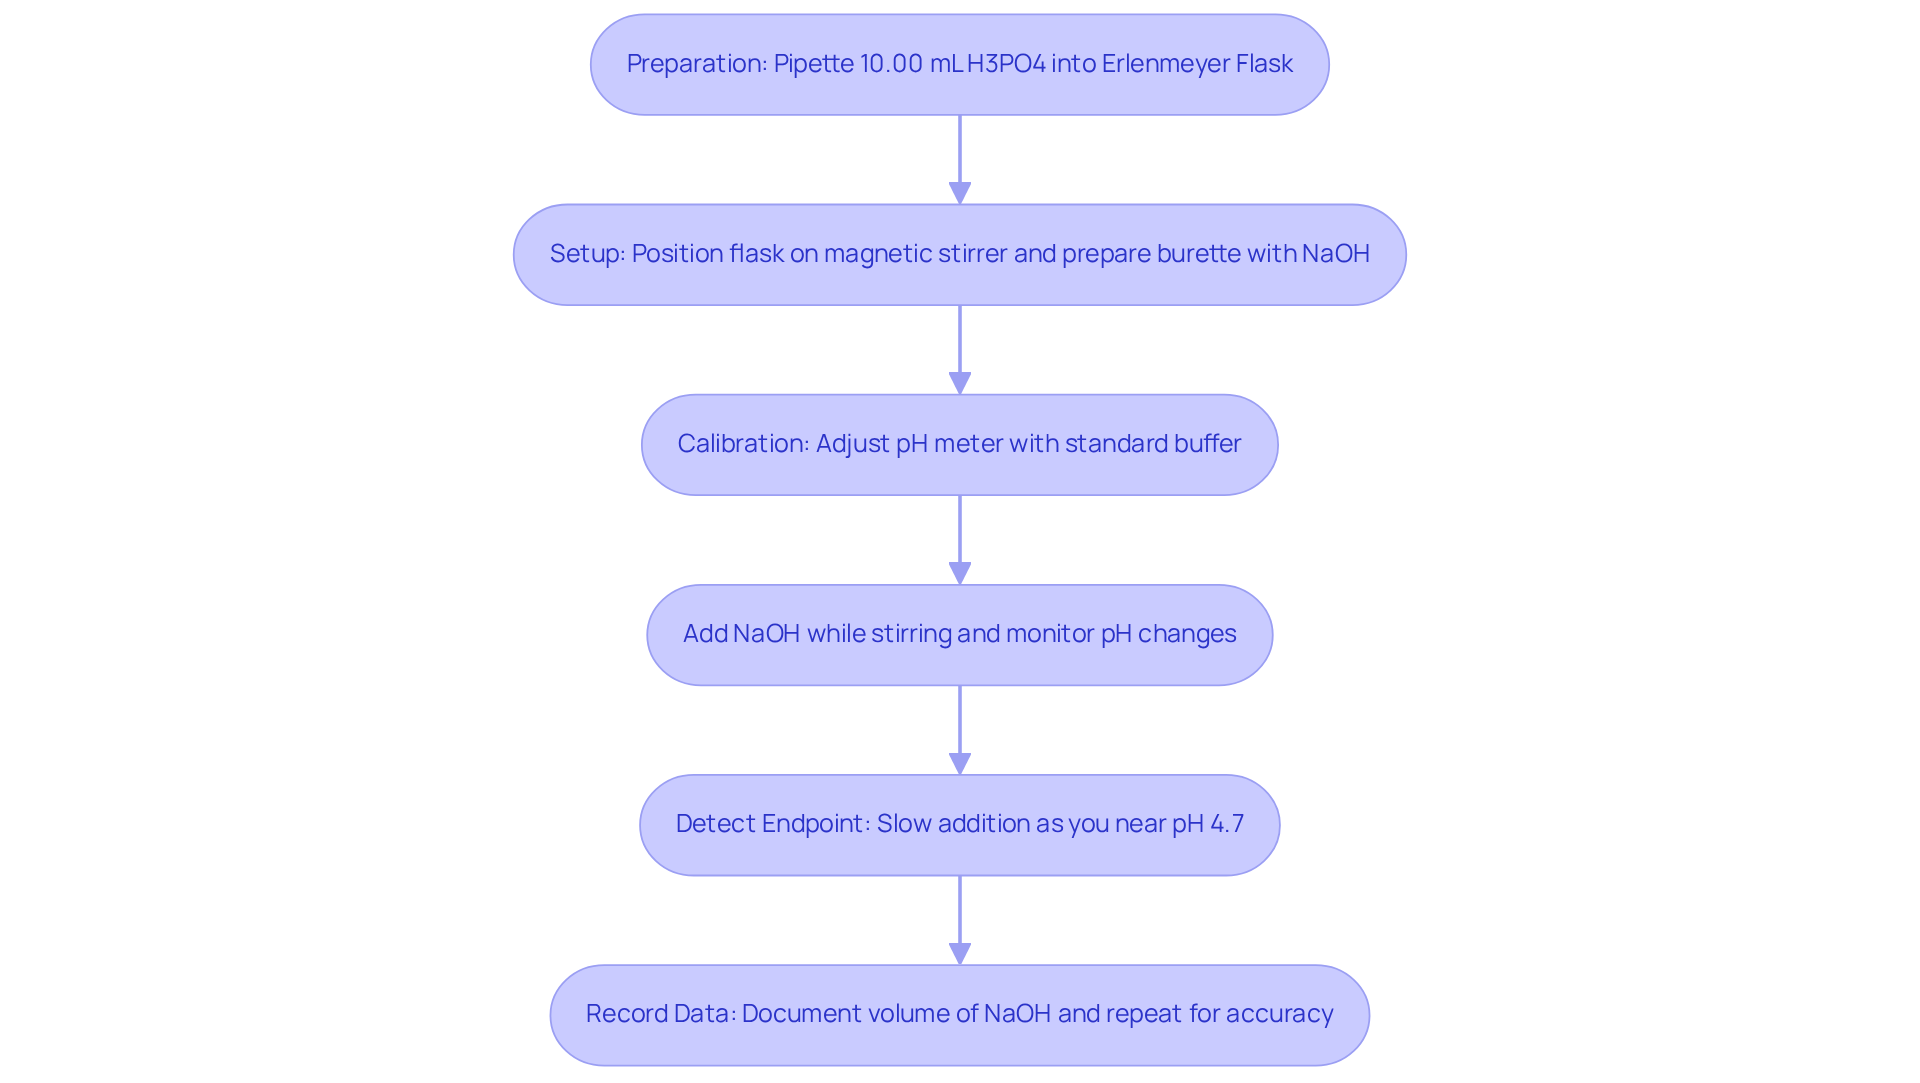
- Preparation for the H3PO4 titration involves beginning by pipetting a precise volume, such as 10.00 mL, of the H3PO4 liquid into a clean Erlenmeyer flask. Dilute this with approximately 50 mL of distilled water to facilitate proper mixing.
- Setup: Position the flask on a magnetic stirrer and insert a stir bar. Prepare the burette with the NaOH liquid, ensuring that no air bubbles are present in the tip.
- Calibration: Adjust the pH meter utilizing standard buffer mixtures to ensure precise pH readings during the process. Employing high-quality pH meters and analytical reagents from JM Science can significantly enhance measurement accuracy.
- For the H3PO4 titration, gradually add NaOH from the burette to the phosphoric acid mixture while stirring continuously. Pay close attention to the pH changes.
- Endpoint Detection: As you approach the expected endpoint of approximately pH 4.7 for the first equivalence point, slow the addition of NaOH to a dropwise approach. This method allows for precise observation of a stable color change, if using an indicator, or a specific pH reading, if utilizing a pH meter. Selecting an that provides a sharp stepwise color change at the equivalence point is crucial.
- Record Data: Document the volume of NaOH used to reach the endpoint. For improved precision, repeat the process at least three times and average the outcomes from these experiments, as this practice is essential for ensuring reliability in your measurements.
By adhering to these steps and utilizing JM Science's innovative measurement solutions—including their range of Karl Fischer reagents and HPLC columns—you can reliably ascertain the concentration of phosphoric acid in your solution, ensuring high-quality outcomes in your laboratory analyses. Experienced lab managers emphasize that meticulous attention to detail during the endpoint detection phase is vital for achieving consistent results. Recent advancements in measurement techniques, such as automated systems provided by JM Science, further enhance accuracy and efficiency, rendering them essential instruments in contemporary laboratories. Additionally, always remember to wear appropriate safety gear, including goggles, gloves, and lab gowns, when handling potentially hazardous substances.

Troubleshoot Common Titration Issues
Common issues may arise during H3PO4 titration, and understanding how to troubleshoot them is essential for accurate results:
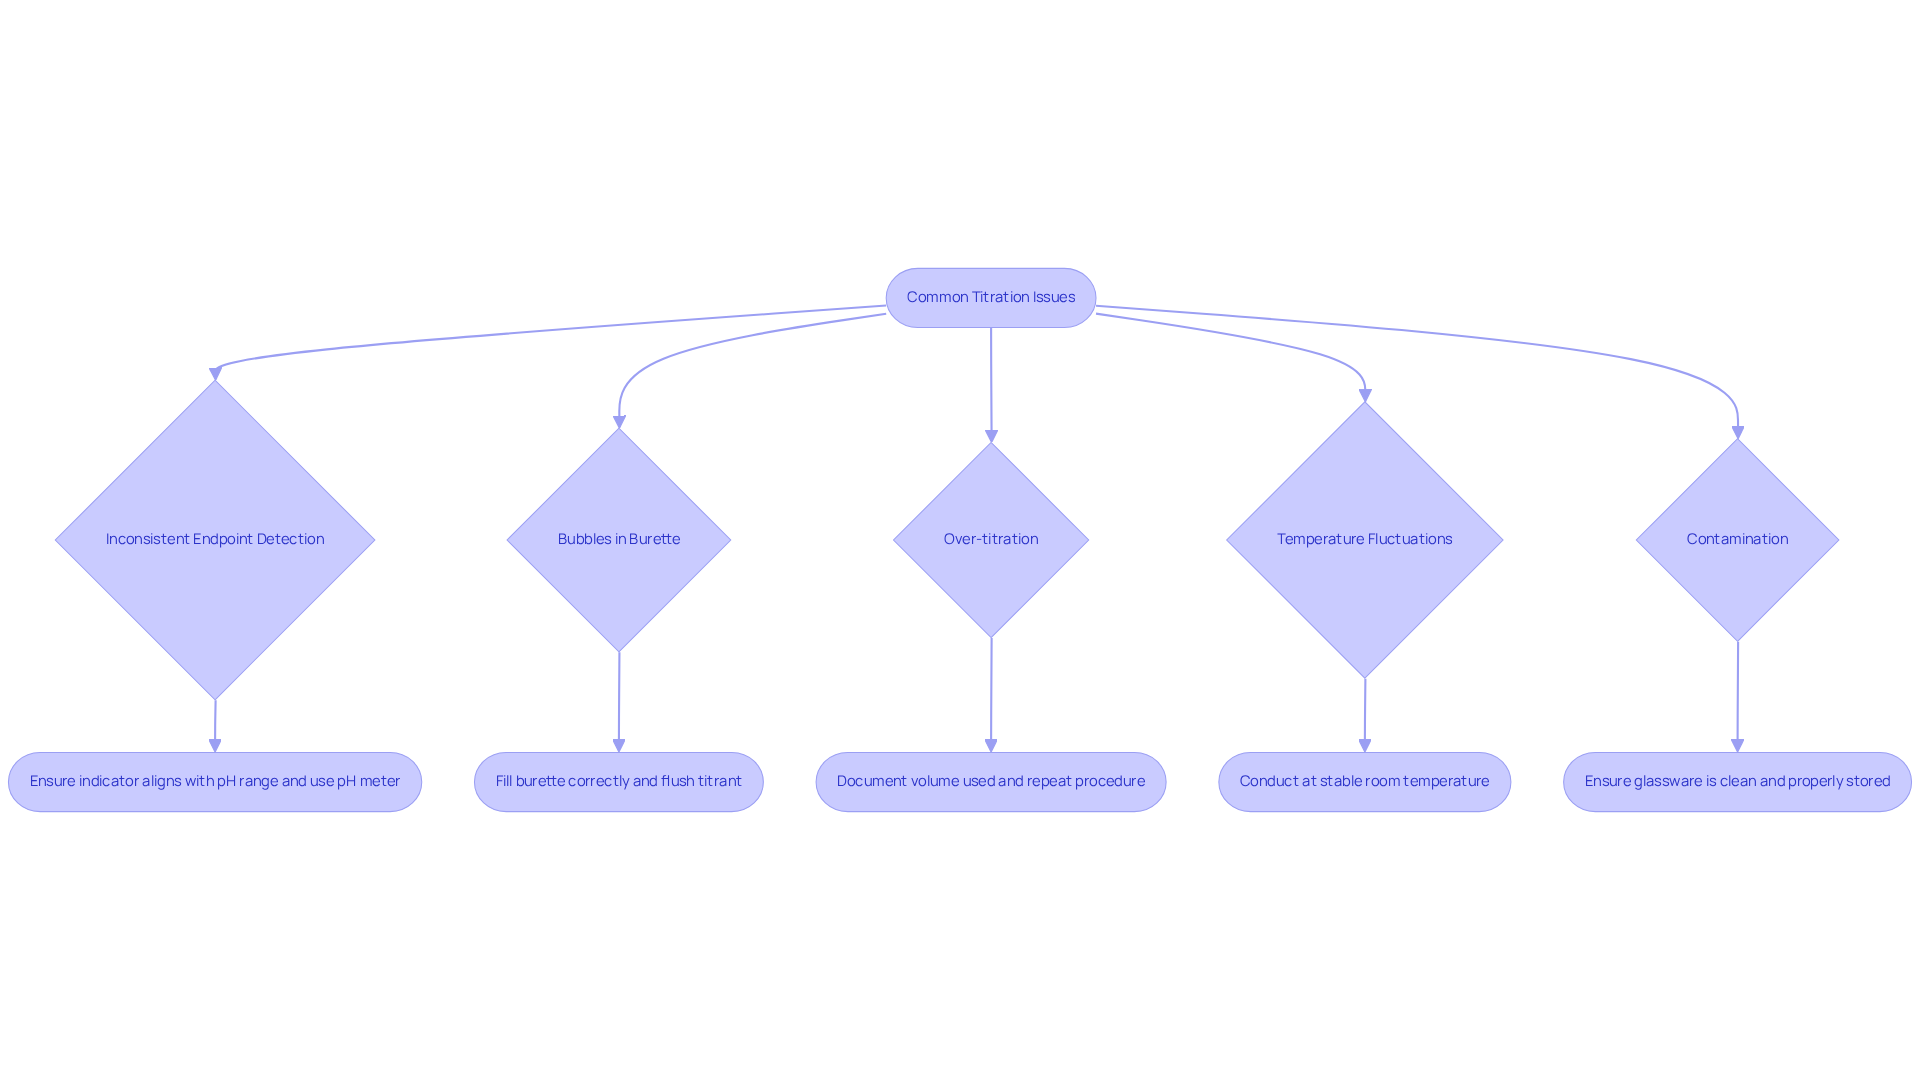
- Inconsistent Endpoint Detection: If determining the endpoint proves challenging, ensure that the indicator aligns with the pH range of the titration. Utilizing a pH meter can yield more precise measurements. Selecting the appropriate acid-base indicator is critical, as different indicators exhibit color changes at varying pH levels.
- Bubbles in Burette: The presence of air bubbles can result in inaccurate titrant measurements. Ensure the burette is filled correctly, and gently tap it to dislodge any bubbles. Flushing the titrant through the tubing and burette can also effectively eliminate air bubbles.
- Over-titration: Should you inadvertently add excessive titrant, document the volume used and repeat the procedure, adjusting calculations accordingly. Regular standardization of the titrant is vital to ensure the accuracy of results.
- Temperature Fluctuations: Temperature variations can influence reaction kinetics and pH readings. Conduct the procedure at a stable room temperature to minimize fluctuations, as temperature significantly impacts the solubility and dissociation of reagents.
- Contamination: It is imperative to ensure that all glassware is clean and devoid of residues that may compromise results. Washing apparatus with the materials being utilized before commencing the analysis is crucial. Furthermore, maintaining proper storage conditions for reagents is necessary to preserve their integrity and effectiveness.
By recognizing these potential issues and their corresponding solutions, lab managers can conduct H3PO4 titration with greater efficacy and confidence.

Conclusion
Mastering the titration of phosphoric acid (H3PO4) is essential for lab managers aiming to achieve accurate and reliable analytical results. This process necessitates a thorough understanding of H3PO4's unique properties as a triprotic acid, requiring meticulous monitoring of pH changes throughout the titration. By comprehending the intricacies of its dissociation steps and employing appropriate materials and techniques, lab managers can ensure precise determination of phosphoric acid concentrations.
The article presents a comprehensive approach to H3PO4 titration, detailing necessary equipment, a step-by-step procedure, and common troubleshooting tips. Each aspect, from preparing the solution to detecting the endpoint and addressing potential issues, is crucial for successful execution. By emphasizing the importance of accurate measurement and consistent practices, lab managers are equipped with the knowledge to enhance their analytical capabilities.
In conclusion, the significance of mastering H3PO4 titration extends beyond mere laboratory procedures; it profoundly impacts the quality and reliability of results across various applications. By implementing the insights and methodologies presented, lab managers can elevate their analytical practices, ensuring that their laboratories operate at the highest standards of precision and efficiency. Embrace the challenge of H3PO4 titration and enhance laboratory outcomes through diligent practice and adherence to best practices.


